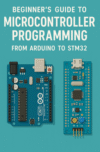
For many electronics enthusiasts, the first taste of embedded systems programming comes through the Arduino ecosystem. It’s approachable, well-documented, and backed by a massive community. But as you grow in skill and ambition, you might find yourself drawn to more powerful hardware—like the STM32 family of ARM Cortex-M microcontrollers. In this guide, we’ll walk through the transition from Arduino to STM32, exploring the similarities, differences, and practical steps to get started.
1. Understanding the Basics: What is a Microcontroller? A microcontroller is essentially a small computer on a chip. It has a processor core, memory, and peripherals for input/output. You write programs (firmware) that run directly on this chip to control hardware—whether it’s blinking LEDs, reading sensors, or managing a robotic arm.
2. Arduino: The Perfect Starting Point Arduino boards like the Uno or Nano are based on 8-bit AVR microcontrollers. The Arduino IDE uses a simplified C++ environment, making it easy for beginners to upload code without worrying about low-level hardware details. Pre-built libraries handle common tasks like driving an LCD or reading a temperature sensor.
Why Arduino Works for Beginners:
- Simple and user-friendly development environment.
- Abundant learning resources.
- Minimal setup; just plug in via USB and start coding.
3. Moving Beyond Arduino: Why STM32? STM32 microcontrollers, produced by STMicroelectronics, are based on ARM Cortex-M cores. They offer:
- Faster processing speeds.
- More memory.
- Richer peripheral sets (USB, CAN, Ethernet, advanced timers).
- Lower power consumption options.
For advanced projects, STM32 chips enable real-time control, complex communication protocols, and more precise hardware interfacing.
4. Development Tools for STM32 Unlike Arduino’s single, simple IDE, STM32 offers multiple development options:
- STM32CubeIDE (official, Eclipse-based, supports code generation from STM32CubeMX)
- PlatformIO (Arduino-like experience but supports STM32)
- Keil uVision and IAR Embedded Workbench (commercial IDEs)
For beginners transitioning from Arduino, STM32CubeIDE is a great start.
5. Programming Model Differences Arduino abstracts away most hardware registers; you interact with pins using functions like digitalWrite(). STM32 programming often involves:
- Configuring hardware peripherals with STM32CubeMX.
- Understanding clock trees and interrupt priorities.
- Writing code that directly manipulates registers for performance.
Tip: You can still program STM32 using the Arduino framework via PlatformIO if you want to transition gradually.
6. Getting Started with STM32
- Choose a Board: The “Blue Pill” (STM32F103C8T6) is a popular low-cost option.
- Install STM32CubeIDE or use PlatformIO.
- Use STM32CubeMX to configure peripherals and generate initialization code.
- Write and Upload Firmware using an ST-Link programmer or USB DFU.
7. The Learning Curve and Payoff Moving to STM32 involves a steeper learning curve, but you gain:
- Greater control over hardware.
- Better performance for demanding applications.
- Industry-relevant skills for embedded systems development.
Final Thoughts Arduino is the kindergarten of embedded systems; STM32 is high school and beyond. Don’t rush the jump—master the basics first. But when you’re ready, STM32 opens a world of professional-grade capabilities without breaking the bank.


